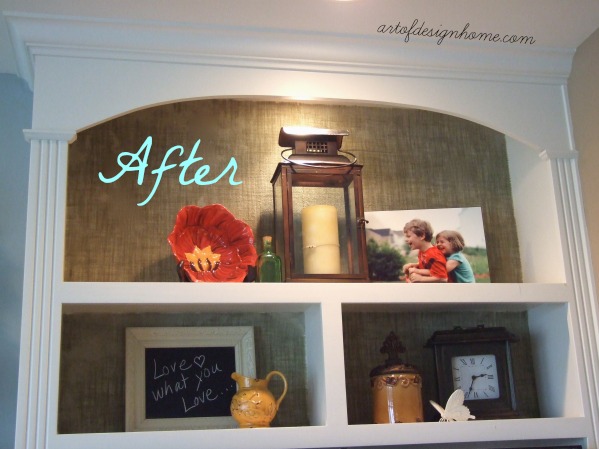
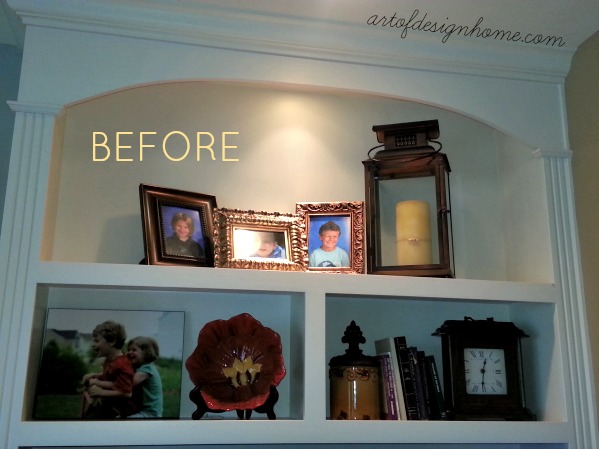
Once upon a time… long before DIY shows were cool, possibly even before HGTV (?), I saw an episode of Room by Room where Sherry upholstered a wall with fabric. She soaked the fabric in liquid starch, and then installed it like wallpaper. I was obviously enamored with this concept, as I put it in my mental filing cabinet, and dragged it out recently for a client project.
Burlap was our fabric of choice, and although it was a bit of a struggle dealing with a fabric that can fray, the outcome is exactly what we were striving to achieve. And now, she has a conversation piece in her family room. If nothing else, she can talk about how her crazy designer remembers obscure design shows from the 1990’s.
These are the items you will need:
• enough fabric
• fabric scissors
• liquid starch (I could only find it at Walmart)
• bucket or pan
• sponge (optional to help smooth fabric)
• straight edge (wide putty knife)
• utility knife and several sharp blades
• spray bottle filled with starch
• towels for wiping up
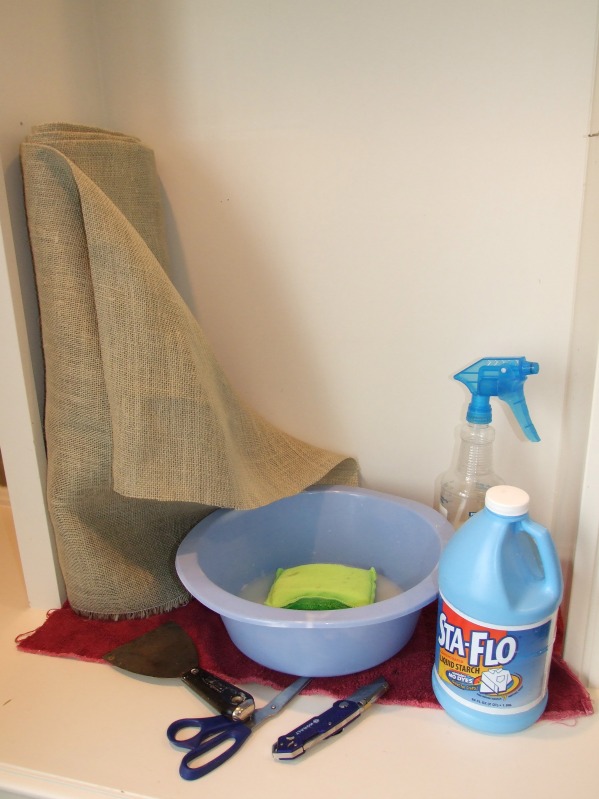
Start by cutting your fabric to approximate width and length. If you choose to do burlap, remember that you can create a straight line by pulling a thread out and then cutting along the remaining space.

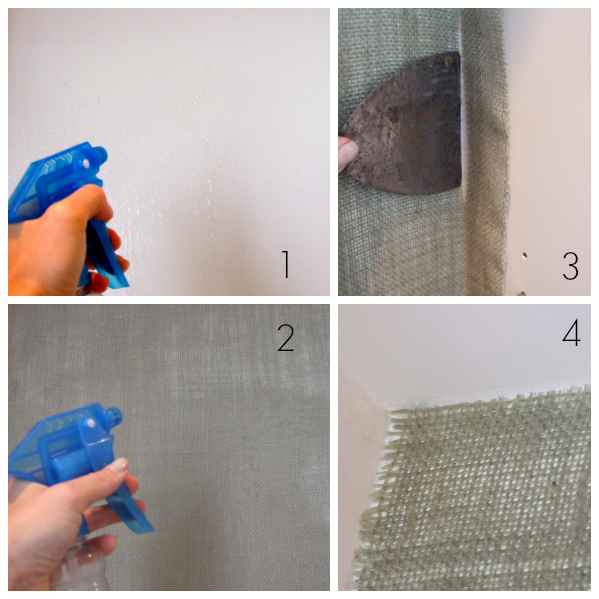
STEP 1: Spray the wall with the liquid starch until it’s fairly saturated.
STEP 2: Hold the fabric on the wall and spray it with one hand as you smooth with the other (larger fabric widths will require two people)
STEP 3: Use your straight edge and your utility knife to cut the fabric to the corners and sides.
STEP 4: Fix the stray edges as best you can, especially if you use burlap.